Thursday, July 25, 2013

The Boredom that is Breadfruit

Breadfruit is an ingredient not commonly found in the Northwest, even in the ethnic groceries I often haunt in search of new tastes. I recently found a single specimen at Uwajimaya, a Seattle grocery that frequently imports and sells unique foods and knew right there and then, it had to be mine.

I eagerly rushed the large bulb to the checkout, concealing it under a bushel of kale, lest some crazed, breadfruit-addict tried wrestling it from me and safely escorted it home. I already knew going in to this that breadfruit is used throughout parts of Asia and the Caribbean as a staple starch crop, much like the plantain. What I didn't know, and discovered upon further research is that it's also one of the highest yielding agricultural plants on the planet (a single tree can provide more than 200 large fruits per season), is chock-full of nutrients, low in calories, high in fiber, almost devoid of fat, sodium and cholesterol and is gluten free to boot. Sure, breadfruit was introduced to Jamaica by Captain Bligh (of 'Mutiny' fame) to feed to slaves. This sort of pedigree doesn't usually suggest a 'thumbs up' rating in the flavor department but then again, servants in Massachusetts used to stipulate in their contracts that they wouldn't be served lobster more than twice a week because it was seen as 'poor mans food' and thought to be bland. Maybe tastes have changed? Had I just purchased the lobster of the trees and if so, is this fruit not more popular simply because it's not readily available here?

No, it's because breadfruit tastes like crap. The fruit I purchased was ripe, but not overly so. The bumpy skin gave slightly when pressed much like a perfect avocado. The white spots on the skin were latex that had seeped out from the interior of the fruit and gave the entire ball a sticky feel.

Latex on Breadfruit

As luck would have it I didn't own a boat of reeds in need of waterproofing so I simply washed the latex from the surface and cut the fruit in half.

Breadfruit 1/2

The taste of the raw breadfruit had a very slight melon tone to it but could probably more accurately be described as raw potato. The smell wasn't unpleasant in the least and the sections that had ripened the most had a very distinct odor of sweetness. This gave me hope. I cut a chunk of the ripest, sweetest smelling portion of the flesh and ate it....Same green-potato flavor, perhaps a tiny fraction sweeter but the difference between it and the unripe chunk in my mouth was so subtle I would have needed the accuracy of a refractometer to know for sure if the sugar content were actually higher.

The flavor, or significant lack thereof, was one issue I was sure could be solved. Most recipes simply use the breadfruit as a starchy vehicle for carrying another, unassociated flavor for a ride. I suppose the same argument could be made for what is most commonly done with  potatos and white rice but the BEST dishes using those starchy foods highlight the natural flavor of the base during cooking (and THEN cover it up with ketchup or soy sauce) The flesh I was working with certainly didn't have much flavor but there WAS something there. My hope was to enhance the existing taste, complement it, and most importantly change the texture from the fibrous, starch block it currently was to something with a more compelling mouth-feel.

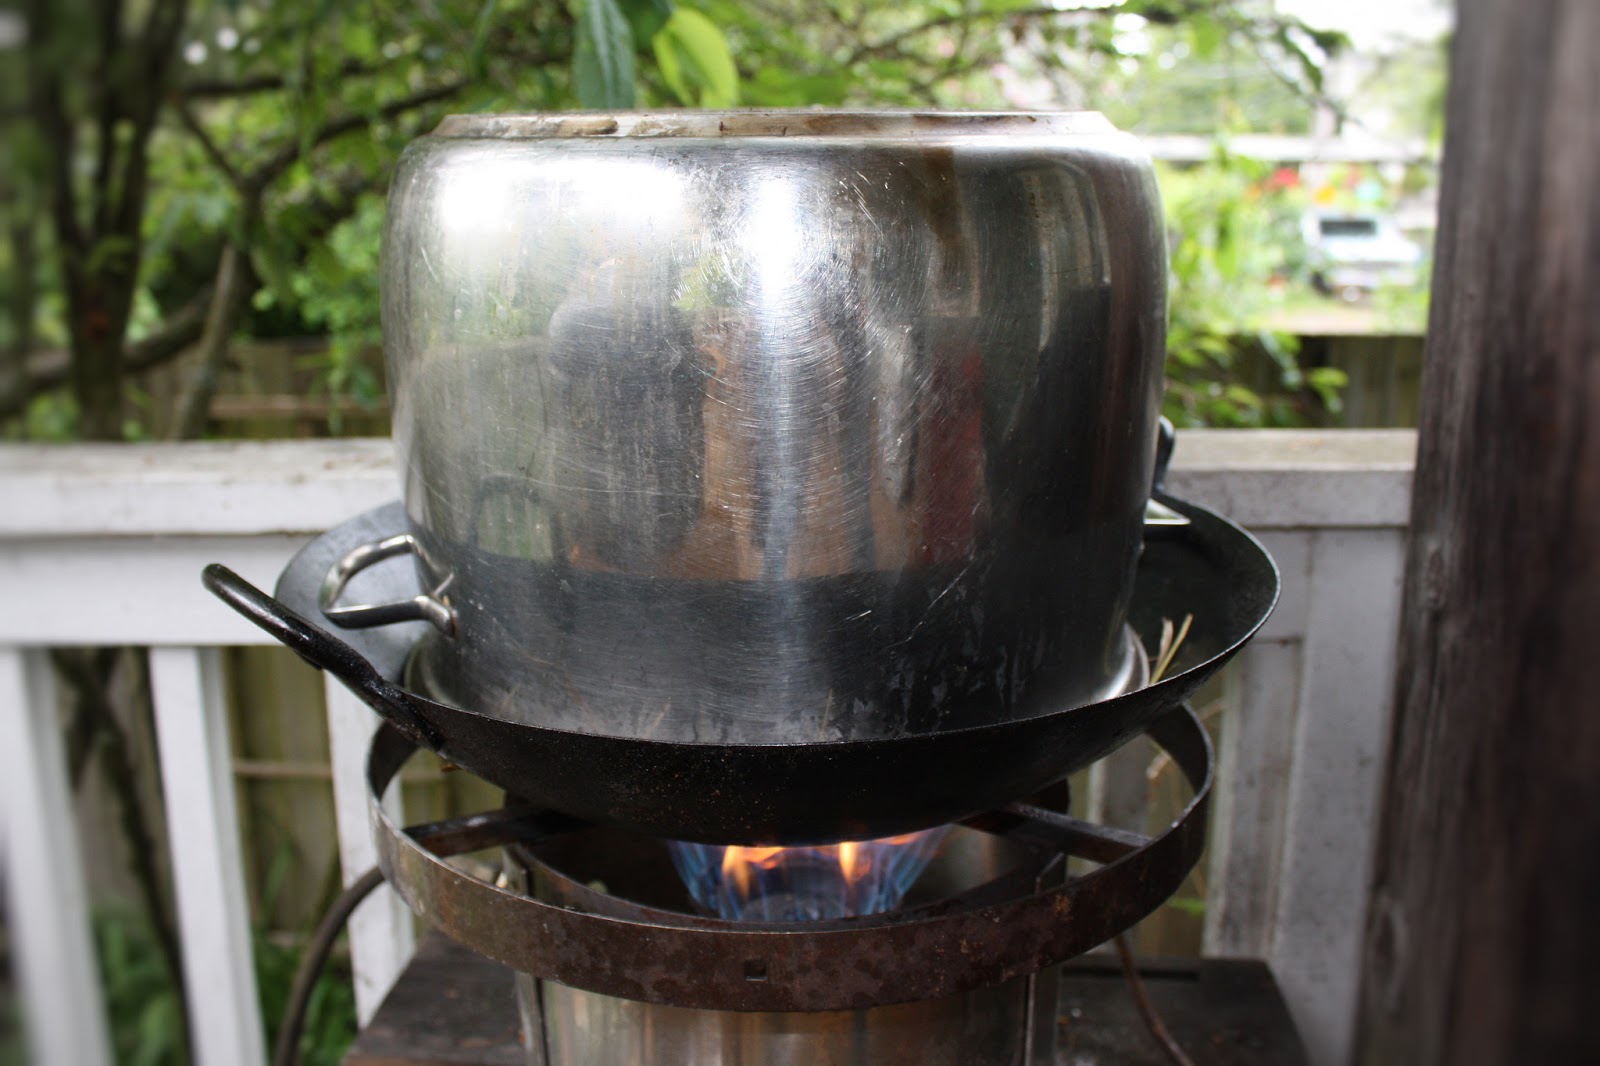
I knew that my first step, regardless of my final dish, was to cook and soften the fruit. Boiling it in a sugar solution would achieve this with the added benefit of bringing the fruit the amount of sweetness I associated with and expected from the smell but couldn't taste.  I also decided to add a handful of fresh Juniper berries to the party for added flavor.

Breadfruit, Simple Syrup, Juniper Berries

I boiled the breadfruit until it could easily be pierced with a knife without falling apart, much the I would when cooking potato.

Once cooked, I blotted the pieces and seared them in a scorching hot pan with ghee (clarified butter).

Breadfruit Seared in Ghee

Finally, the caramelized chunks were plated with red peppercorns, basil and sea salt.

Caramelized Breadfruit

The finished dish was pretty but how did it taste?  Not bad but not good either. In a word, boring. The sweetness was there, the basil tasted like basil, the subtle bite of juniper was great,  the peppercorns were a nice pop but the breadfruit itself could have been mistaken for anything from plantain to yucca to a wad of flour. Next.

Maybe I needed to get MORE breadfruit flavor into the breadfruit?  I was really struggling with this one now and decided to pull out the big guns.  I started by pureeing boiled breadfruit, running the resulting paste through a centrifuge at 4000RPMs for 1 hour and using the thinnest, intensely flavored, top liquid layer of the centrifuged mix to compression infuse into more raw breadfruit before cooking the whole shebang sous vide for nearly an hour. 

Compressed Breadfruit

I'm not even going to dignify the result of this one with a picture.  Oh it was "breadfruitier" but for the record that's not necessarily a good thing. Again, it wasn't that the taste of the breadfruit was offensive but that it really wasn't very good either.  Couple that with the texture and starchiness of the chunks and the whole scene just got rather offensive. Next.

Up until now my attempts had been to treat this ingredient like a fruit and I was getting nowhere. What if instead I treated it like bread?

I started by taking the remaining breadfruit that had been boiled until soft in simple syrup and running it in a food processor until smooth.  I then took the resulting paste and pushed it through a ricer to eliminate as many of the long fibers as possible.

Breadfruit puree run through  a Ricer

Finally I mixed the now, relatively fiber-free paste with unsalted butter and pressed in onto the bottom and sides of a small tart tin. This was then baked for about 20 minutes at 400F.  The breadfruit crust browned beautifully and dried to an even crispness.  Finally, I topped the shell with a slice of grilled peach,  a balsamic vinegar reduction and fresh basil and enjoyed. Finally.

Grilled Peach, Balsamic Vinegar Reduction, Thai Basil, Breadfruit Crust

Did the breadfruit crust turn out well?  Absolutely. Would I make it again? Absolutely not.  I didn't go into listing the proportions of ingredients I used this time as some things are better off lost to history.  The breadfruit crust TASTED good but due to their limited availability here, their cost is unjustifiably high (this one was 8 bucks!). Add to that the fact that it still wasn't anywhere near as good as a traditional flour crust and this quickly becomes a really fun experiment but definitely not something worth adding to my, or anyone else's repertoire.

In closing, I'm sure there are dozens of traditional, indigenous and delicious recipes that make good use of breadfruit.  The last thing I need is to get served with a libel lawsuit from the American Breadfruit Council. I personally, however don't see the properties of this ingredient lending themselves well to inventive and creative uses but if anyone else out there has tried making non-traditional foods with it (successfully) I'd love to hear about it!

Monday, July 15, 2013

The Science of Summer - Churning and Freezing

What's better than ice cream!?  Well....nothing but since it's impossible to serve my readers food via the internet, here's the second part (part one) of a series of videos I've done exploring the science of ice cream and how it's made.

I've been working this summer with César Vega, Research Manager at Mars Symbioscience and co-author of the highly praised book, The Kitchen as Laboratory: Reflections on the Science of Food & Cooking to help understand the surprisingly complex play of elements that go into the seemingly simple result that is ice ice cream.  This week's episode: Churning and Freezing. Enjoy.
The Kitchen as Laboratory: Reflections on the Science of Food & Cooking - See more at: http://www.thingsaboutfood.com/2013/05/the-science-of-summer-ive-recently-been.html#sthash.7NzYRfSq.dpuf
César Vega, Research Manager at Mars Symbioscience and co-author of the highly praised book; - See more at: http://www.thingsaboutfood.com/2013/05/the-science-of-summer-ive-recently-been.html#sthash.7NzYRfSq.dpuf
César Vega, Research Manager at Mars Symbioscience and co-author of the highly praised book; The Kitchen as Laboratory: Reflections on the Science of Food & Cooking - See more at: http://www.thingsaboutfood.com/2013/05/the-science-of-summer-ive-recently-been.html#sthash.7NzYRfSq.dpuf

Thursday, June 27, 2013

Taking "stalk" of lettuce

Having just returned from an always too-short eating odyssey through SE Asia, I've come home with a long-running list of food discoveries that are begging further exploration.  Although some of the ingredients used in the dishes I ate aren't available outside of their 'home country', the vast majority of them are.  Available yes, known about or even seen by the average shopper, no.

In keeping with the theme of this blog, my goal is to shed some light on the particularly tasty ones as well as experiment with interesting and unconventional applications using them.  In the hopes of not alienating my readers by discussing how to properly steam squid teeth (not available here, I checked), or the correct sous vide temperature for balut (is available, blog post soon) I thought I'd start simple and work my way up. 

Celtuce, like many of the "uncommon ingredients" I cover in this blog, can be found sold under several aliases. Also known as stem lettuce, celery lettuce, asparagus lettuce and Chinese lettuce (notice a theme here?), celtuce IS a type of lettuce but one whose Romaine-like leaves shoot out from a long, hearty stalk rather than emerge directly from the ground.  The taste of the leaves can be bitter, increasingly so with age, making them perfect for applications where one would traditionally use chard or kale.  The stem however, is the business end of this vegetable; quite mild and with an incredibly satisfying crunch. 

Celtuce

The stalk of celtuce is surrounded by a thick and fibrous skin that needs to be removed before eating.  The tender heart of the stem is easily reached using a vegetable peeler or mandolin and is best when eaten raw, lightly steamed/blanched, or quickly stir-fried. If cooking, like all vegetables, be careful not to overdo it lest you end up with a mushy, tasteless green pudding.  When peeling, it's very easy to visually determine the correct amount of outer skin to remove as it contains long white fibers that give way to the obvious milder green, translucent heart. 

Because I think celtuce is best when raw, but writing a food blog that showed readers how to peel and eat a vegetable would be embarrassingly useless, I decided to make a crispy, Summer salad with it instead.  The following recipe is a take on an accompaniment I usually make with cucumber when serving sashimi.  After tasting this dish made with celtuce though, I swear I'll never go back.


Spicy Celtuce Salad


Ingredients                                 grams                                                     U.S. measurement
 
Celtuce - thinly sliced                    100g                                                              (1 cup)
Celtuce - diced                               50g                                                              (1/2 cup)
Rice wine vinegar                           20g                                                                                    (1 1/2 TB)
Sugar                                            10g                                                                (2 1/2 tsp)
Sesame Oil                                      5g                                                                (1 tsp)
Franks Red Hot                             10g                                                                (2 tsp)
Fresh tomato, cubed                      50g                                                                                     (1/2 cup)
Toasted Sesame seeds                     2g                                                                (1 tsp)


Celtuce - Raw

Celtuce - Peeled 

Remove the tough outer skin of the celtuce using a vegetable peeler or mandolin.  


Celtuce - thinly sliced

After the tough outer skin has been fully removed, continue slicing with a vegetable peeler or mandolin until all of the delicate flesh has been removed. Be careful not to slice too deeply though to avoid incorporating any of the small, white, and sometimes bitter inner core.


Celtuce - cubed

Cut a portion of the peeled celtuce into small dice.  This will add an interesting textural component to the finished salad.

Place the sliced and diced celtuce and cubed tomatoes in a non-reactive mixing bowl and sprinkle with sugar.  Add the sesame oil, rice wine vinegar, hot sauce, and toasted sesame seeds.  Toss and let sit for 5 minutes for the flavors to meld. Plate and enjoy.

Spicy Celtuce Salad

Wednesday, May 29, 2013

Hay, that's delicious

A few years ago I visited a ranch just outside of Seattle to purchase a bale of hay.  Spring had recently sprung and put me in the mood for farm fresh flavors. Sure, I could have picked up some fiddlehead ferns, fresh asparagus and some first-run Chinook salmon at the Pike Place Market to make a spectacular Spring feast without ever leaving town but that would have been too easy.  Remembering a gigot d'agneau au foin, or leg of lamb cooked in hay I had eaten in France several years prior, I decided that THIS was the farm flavor I was after.  Cooking food in hay is a centuries old technique and has recently had a resurgence of interest among experimental chefs.  In addition to working as an insulator that helps to regulate the temperature of the meat during cooking,  hay also, not surprisingly, imparts a very unique and delicious, grassy note to the foods that are cooked within it.

Since acquiring this enormous block of pasturage I've used it to make 3 legs of lamb, 2 hams, one rabbit, a knapsack of parsnips and a goose, yet seeing it again last week, still in my basement, I'd swear the bale has only grown larger.  Before spreading the remaining cubic yard of dried grass as mulch in my herb garden, I thought it would be fun to explore using the farm flavor in some less traditional ways. 

Like many foods with unique flavors, my first instinct is always to run it through my rotovap and see what comes out. The rotovap, as I mentioned in my post on kimchi, is an extreme flavor extractor that efficiently leaves one with a pure concentrate of the base ingredient.  "Raw" hay however, isn't excessively flavorful in its dried state (probably the reason why we feed it to cows and then eat the cow rather than just eat the hay itself).  Because of this, extracting the flavor of hay in my rotovap worked but it required 9 separate runs of the apparatus to get enough essence to be useful.  I did end up using my hay liquor on raw oysters (delicious), to flavor vodka (also delicious) and to infuse butter which was spread on fresh baked bread (ridiculously delicious) but these were all savory applications.  What about dessert? 

As I mentioned, extracting the flavor from hay using a rotovap is a time consuming process. It's also a process that giving a recipe for would be about as useful to most readers as if I suggested they launch the grass into orbit.  No rotovap, no hay extract.  My goal was to find a means of delivering as much farm flavor as possible while still using a technique that everyone has access to, in a delivery medium that everyone loves. I give you StrawVery Ice Cream.  


StrawVery Ice Cream

350g (1 1/2 cups) Heavy Cream
244g (1 cup) Whole Milk
150g (3/4 cup) Sugar
5g (3/4 tsp) Salt
6 egg yolks

Bring cream, milk, sugar, and salt just to a boil in a 2-quart heavy saucepan, stirring occasionally. Lightly beat yolks in a large bowl, then add hot sweetened cream in a slow stream, whisking. 

Pour custard into saucepan and cook over medium heat, stirring constantly with a wooden spoon, until a candy or instant-read thermometer registers 170°F and custard coats back of spoon, about 10 minutes


Hay, Water
Soak the hay in warm water to saturate.


Place wet hay in the bottom of a large cooking vessel.  A wok works perfectly for this.


Invert a vegetable steamer and place it over the damp hay. If your steamer has legs on the underside, remove them.


Fill a heat proof bowl with the ice cream 'batter' made in step 1 and place on top of the inverted steamer.

Invert a second, larger vessel on top of the entire apparatus and ignite the burner to smoke the batter.  Pure white smoke will start puffing from the union of the base and lid within seconds indicating that your rig is working properly.....or the successful election of a new pope.  Remove the lid every couple of minutes to taste the  'batter' and stop the process once the farm flavor has achieved your desired level of hay.


Freeze and churn the now hay-smoked batter using your preferred method and enjoy.

Friday, May 17, 2013

Deep Frydeas

Things have been unusually hectic lately, both setting up my new business website focusing on the simplistic visualization of the complex science of food ( animationkitchen.com ), as well as researching sources for new and unusual foods to discover on my lightning-fast approaching trip to Vietnam.  Despite my recent 16-hour work days, I have, of course managed to make time for the things that are most important in life....well, at least cooking.

Last Tuesday I got together with my buddies Jethro (jetcitygastrophysics.com) and Scott (seattlefoodgeek.com) for our sporadic, but generally speaking, monthly "Cooking Experimentaganzas". These sessions typically have a loose theme, involve danger, and result in dishes that range from extraordinarily delicious to OMG that sounds totally disgusting even on paper, why would you ever THINK of making that let alone eat it?  This week's theme - Deep Frying.

We each had some interesting ideas heading into this challenge but at some point in history, pretty much everything on Earth has been deep-fried making it a tough exercise to bring a lot of freshness to. The  majority of our attempts focused primarily on introducing modified food starches into otherwise "un-deepfryable" foods through the process of injection or infusion. Rather than coating a food in a batter, our goal was to change the structure of the food itself, thereby eliminating the need for a coating. 

Several of our attempts, although not failures, still require further tweaking to achieve a desired result. The sugars of the potato-starch infused strawberries DID caramelize without burning the berry, but in the end we decided they still wouldn't be anywhere near as delicious as fresh ones so why bother. (The green tops however, were fantastic).  The deep fried sriracha foam, stabilized with xanthan gum, finally did fry up without melting but the flavors became so subtle from the cooking process that exploring the addition of another protein to make it crispy hardly seemed worth the effort.

Raw popcorn kernels, ensconced in an elastic dough never popped. My claim, when I came up with this idea, was that it would be cool to have a popcorn flavored, puffy centered bite with a crispy outer shell. Cool sure, but between you and me I really wanted to see if anyone would get burned by exploding oil. Epic failure on both counts. Before trying this brilliant plan again using a thinner dough we took a gamble and plunged several kernels directly in the fryer. Still no pop!  With no time for further testing that evening, we're left still not sure if the kernels were "bad" or if there's a more sinister issue with improper heat transfer when corn is submersed in oil vs. in contact with a hot surface.  Another night.

We did have one enormous success but due to a hand-shake NDA I can't divulge the recipe until we determine its market potential (AKA sell it to the highest junk-food conglomerate bidder).  The most valuable take-away from our session however, (besides our impending multimillion dollar success in the snack industry) was sitting down and researching what actually happens to food when it's deep fried.  This wasn't my first fried-food rodeo but since our get together I've continued playing around with and learning the science of this cooking technique. Researching the "what's happening" at the micro level has given me a greater sense of what to watch for during the cooking process, and perfect results every time.

The following is an animation I put together explaining the process. The biggest "take-aways" for chefs not already intimately familiar with the process are A:) Those bubbles you see when foods are plunged in hot oil are superheated steam. This steam not only evaporates from, and therefore dehydrates the submersed food, but they also cool the surrounding oil and the continuous pressure of their violent escape keeps oil from entering the food.  The reason every deep-fry recipe says "don't overcrowd the pan" isn't to deprive you of timely, crispy golden deliciousness, but is there as an important reminder to keep the temperature of the surrounding oil hot enough to maintain the formation of these protective, evaporate bubbles. I know it can be  a tough one to follow but please, don't overcrowd the pan. The second most important visual to understand is B) when those bubbles stop, don't look away.  The end of the bubbles (steam) is an indication that the food is nearly devoid of water.  It's at this point that the browning begins and the food should be watched closely for that perfect golden color indicating it's time to eat. 

Now fry yourself something delicious and watch the show....or rather watch the show and THEN fry yourself something delicious.


Thursday, May 9, 2013

The Science of Summer


I've recently been working with César Vega, Research Manager at Mars Symbioscience and co-author of the highly praised book; The Kitchen as Laboratory: Reflections on the Science of Food & Cooking to help illustrate what's going on, under-the-hood, when we make ice cream.  The following 3D animation is a visualization I created showing one important step in this complex (and delicious) process, the foam. 


The Building Blocks of Ice Cream by Cesar Vega


Wednesday, May 1, 2013

Upside Down Pie

Four posts in and it's already time for a mix-up.  Up to this point, my examples of "Unconventional Cuisine" have focused on unique ingredients that most home cooks may have passed in a well-stocked grocery but were clueless about how to use.  Although I fully intend on continuing this line of exploration in future blogs I do understand that some of my readers are also looking for cool stuff they can try with items they already have in their kitchens. This week's post does involve prickly pear and kumquats, both technically "unique" foods, but the real star of this simple dish is an underutilized cooking technique for the home chef. Couple this with the fact that readers can substitute whatever they want (within reason people) for the oddball fruits I chose and STILL end up with something delicious means we have a winner.

The Wonderful World of Curds

Without getting into a big history lesson tracing the importance of curds dating back to the Medieval age (although that would be fun) I'll just say that they're old and they're delicious.  The technique that produces curds is hardly a 'lost art' but rather a simple technique used frequently in production cooking, but one that most home cooks either avoid accidentally doing, have no idea they're taking part in, or simply never think of exploiting to their advantage.  One of the simplest curdles, and one I'm sure most people are familiar with, is when lemon juice is added to milk. The resulting lemon-chunk-mucus drink is pretty gross and not the least bit appetizing as a quencher but what if you could easily control the process to get a desired result? What about instead of thick chunk-cobs you could achieve a uniformly thickened gel?  What if I told you this dairy gel went by the very sexy name of posset? Interested? I thought so. Read on.
 
I recently made a posset on a whim, thinking I would surely find a use for it in an upcoming dinner party I was throwing.  A traditional posset, according to Merriam and/or Webster is "a hot drink of sweetened and spiced milk curdled with ale or wine".  Again, without going into the saga of curds, their purported medicinal uses or how similar (or different) they are to caudles, I'll simply state that possets can take many forms. The traditional posset IS curdled with ale or wine but the posset I made was an updated version using no alcohol, and had I added egg yolks to the mix, could easily have been called a custard.   Despite its pedigree, my posset never made its way into anything 'official' for dinner but at the end of the night, when everyone was finishing off the last of what seemed like a dolium of wine I put it out (de-posseted?) it on the table for my guests. I've used the 'everyone's had a lot of wine, and although they just ate a 9-course dinner, will pretty much still eat anything' scheme in the past to rid my fridge and cupboards of a number of  random foods nearing the end of their useful lives but this offering totally earned its keep.  There was just something so elegant and creamily-satisfying about this simple curd dish that it easily could have passed for a well planned finalé.

As I stated earlier the curdling of milk proteins with acid technique is hardly a new one.  This insta-curdle method is what gives fresh cheeses such as mascarpone, ricotta and paneer their body and has been used for ages. Rather than simply demonstrate how to curdle milk in an ancient manner, I put together a complete dish (recipe follows) using posset as the base, or in this case, the middle. Because of the tart, almost-lemony flavor of  the posset made from this following recipe, I thought it would be fun to use it in an upside-down play on lemon meringue pie.  Keep in mind that this posset is more than delicious on its own but pairs remarkably well with a myriad of toppings. Beyond the basics of the curd, feel free to substitute whatever items are in season or that you like best. Most importantly, this one's almost impossible to mess up so just have fun!

Prickly Pear and Kumquat Upside-Down Meringue Pie

Ingredients

Heavy Cream 1 1/2 cups
Sugar 1/4 cup
Citric Acid 1/2 tsp (may substitute 1/4 cup lemon or other citrus juice)
Seasonal Fruit
Meringues (homemade or store bought)

note: There are many great reasons why recipes should, and are beginning to be written in  measurements of weight rather than volume. For the sake of this post being geared for use in the "common kitchen" I've standardized the measurements into old skool cups and tsps.

Heavy Cream, Sugar
Measure Cream (1 1/2 cup) and Sugar (1/4 cup)

Citric Acid
Measure Citric Acid (1/2 tsp) (or citrus juice (1/4 cup) if substituting)


Heat to 190F
Mix cream and sugar and heat to 190F; stirring constantly. When temperature is reached, remove from heat and stir in citric acid or juice.  Allow mixture to sit for 10-15 minutes to cool slightly then place in the refrigerator for 12 hours to fully thicken.  The posset will thicken up noticeably within several hours and if you're happy with the texture, it can be used at this time. I think the viscosity is prime when left overnight to gel, but if you're in a hurry the taste will be identical beforehand. 
 

Kumquat
Prickly Pear
Dice whatever fresh fruits you've chosen to make a compote. In this case I used kumquat and prickly pear.

Prepare Meringue

Use a circle cutter to carefully score a circular ring in your meringues, removing the interior to create a bowl (this becomes the 'upside down' part of the "pie").

Finish and enjoy


Fill the meringue cavity with posset, top with fruit compute and dabble additional posset on top. 

Wednesday, April 17, 2013

Sous Vide: Epazote 1

Like many bloggers I'm always in the market for good ideas.  A friend of mine recently posted a comment on Facebook that her "weakness in the kitchen isn't with flavors and balance as much as it is with what temps and the "right" ways to cook varying meats to get the right reactions".

She was seeking help on getting "
the sear without drying things out, to get things moist without having them just be entropic and crock-pot-y."

Challenge accepted.

There are SO many components
that play roles in reducing (or adding to) the crock-pot-yness of a dish that it's understandable why so many people give up and learn to live with blah. What cut of meat do I use? Should I marinate or brine? Do I add fat and if so, when? What are the cooking times and at what temp? Should we just go out to eat instead?  These are all questions that need answers and ones that contribute to the finish of any dish regardless of the cooking method employed. There is one overarching technique however that stands alone in its consistently moist, easy to pull off, error-free, and no-holds-barred guarantee in hearing the magical, "holy crap, that doesn't taste like it came out of a crock pot" from your dining companions.  Sous vide.

When I started this blog I told myself that I would never cover sous vide cooking in any detail.  Don't get me wrong, this technique is probably the most revolutionary cooking method right after the microwave oven, but is just now starting to be adopted by the general public.  It's the one technique that I use probably more than any other, not just for its consistent outcome but also for its ridiculously easy setup, and lack of monitoring with perfect results every time. That being said, it's also one of the most heavily blogged about of the Modernist cooking techniques and therefore one I didn't feel was apropos for a blog that aims to introduce readers to "new things". 

That being said my friend had a problem and I had a solution. Surely there was a way I could find a compromise to satisfy both of our "needs".  The easy route would have been to tell her to buy a Polyscience immersion circulator ($799), an ARY chamber vac ($999), a leg of lamb ($30), some "weird" ingredient she could find at an ethnic grocery ($cheap), throw them all together in a vacuum sealed bag, set it in a water bath at 134F (26.5C) for 10-48 hours and eat. Blog post, DONE! 
 

Sure the blog would be done, but rather pointless. I knew it was highly unlikely my friend would actually buy any of the pricey gear I just mentioned but more importantly, even if she would have purchased the gamut, I've yet to set up Google AdSense on my website to get the "kickbacks" these purchases would bring, making it a no-gain post for me. In light of zero income generation possibilities I decided to take the more time consuming, "high road" and develop a cheaper, but equally delicious, home recipe that would introduce any readers still in the dark not only to the concept of sous vide cooking but one that also showcased an awesome "new" ingredient for my blog (gotta stick to the rules). I also wanted something that could easily be prepared at home with no capital (and very little time) investment.....at least until I get my readership high enough to justify that Google AdSense thing and cash-in on those culinary equipment kickbacks.

Cooking method, check. The only remaining questions were what 'new' ingredient I was going to feature and what other foods were going to take a warm bath with it? There's a decent little Mexican market near my house that seemed like the perfect place to find an accomplice to join me in my sous vide adventure. I wasn't expecting to discover any unique, Mexican specialties here such as escamoles (ant larvae) or chapulines (grasshoppers) and even if I had, I'm pretty sure that cooking them long and slow in a bag wouldn't be the ideal method of bringing out their best.  I was, however, certain that I'd find some interesting herbs, vegetables or at the very least, unique chiles that I could make work for this challenge.  After spending what seemed like an hour, and I'm sure to the bewildered shop keeper like a day, looking, smelling, and when the owner would turn her head to sell a Mexican Calling Card, tasting various components that looked promising, I landed on fresh Epazote.

Epazote is a Mexcian herb that I put in the Cilantro league. Also known by the alluring names Wormseed, Stinkweed or West Indian Goosefoot (by no means to be confused with East Indian Goosefoot) Epazote,
has nothing taxonomically in common with Cilantro. I lump these two together because like Cilantro, Epazote is a food that some people adore while others can't even stand being in the same time zone with.

 Epazote Leaves

Personally I love the powerful taste that seems to change over the course of chewing but admit it can be a frustratingly 'tip of your tongue' kind of flavor. You're certain you know what it tastes like but just can't quite think of the word. I've heard the flavor compared to parsley, celery, anise, tarragon, root beer, creosote, turpentine and gasoline.  All correct answers but all wrong too. It's not that all of these differnet flavors are competing with each other at the same time but more that your head keeps jumping around thinking it's one flavor and then the next second that it's something else.  Total herbal mind F%k.

In Mexico, Epazote is frequently used in bean dishes, moles and stews.  The symbiotic pairing with beans is due the legumes mellowing prowess on Epazote's strong flavor AND Epazote's role as a carminative (gas reducer) on the beans. Simply adding a finely chopped handful of this herb to any standard out-of-the-can bean dish can bring a new dimension (and less flatulence) to an otherwise boring side. No sous vide required. 

 Epazote and Beans -You complete me XOXO

My mission: to incorporate Epazote in a dish that A: used sous vide as the primary cooking method while keeping the process practical for the average home cook, B: didn't overpower the headline ingredient (whatever that was going to be) with the taste of creosote, and C: didn't hide the unique taste of the herb either.

As for the main ingredient I knew that red meat, particularly tough cuts such as short rib or shoulder were out of the question for this job.  Preparing these types of cuts are where sous vide cooking really shines, but unfortunately inappropriate for this challenge because of the exceptionally long cooking times required.  Even though I was confident my friend wasn't willing to shell out nearly two grand on new kitchen equipment, I was absolutely positive she wasn't game for sitting in front of her 'peasant' stove for 72 hours monitoring the temperature of a pot of water.  This had to be quick.  

A lot of people wonder why cooking times need to be so long for certain cuts of meat.  Does it really take 3 days to heat up spare ribs in a water bath? In a nutshell, no.  Depending on its thickness, most cuts of meat prepared sous vide will be fully cooked in several hours. Fully cooked yes, tender and unlike the crock pot crap we're trying to avoid in the first place? No. The seemingly excessive times some meats need to spend at a held temperature is what breaks down the collagen within the meat.  Over time the collagen fibers are converted to gelatin and in the process the meat acquires a melt in your mouth texture impossible to achieve by any other method. As an added bonus the meat is held within a sealed bag during the entire process, preventing  moisture from evaporating or dripping away. These long cooking times can be sped up to some degree by increasing the temperature of the bath, but with the negative effect of contracting to collagen TOO quickly and wringing additional moisture from the meat. While this wouldn't necessarily dry the meat to crock-potty levels it certainly isn't a good idea and one we will avoid all together for this post.


Collagen Breakdown
Short animation I created showing the breakdown of collagen and moisture loss at different cooking temperatures and times.


Seafood, on the other hand, can also be cooked precisely with sous vide and in MUCH shorter periods of time. Cooking fish perfectly would only require my friend to periodically monitor the temperature of her water bath for about 25 minutes.  In a society that on average watches 34 hours of television per week, 28 of which seemingly involves a Kardashian, "sacrificing" half an hour to make a restaurant quality meal seemed like a reasonable request.    


Cooking Method Comparison
Short animation I created that shows the difference in thermal transfer between sous vide and conduction cooking methods.


salmon sous vide, epazote, pinto bean foam, tomatillo salsa, salmon skin chip


Prepare brine
Mix together

2 cups water
4TB Salt
2TB Sugar


Submerge salmon in brine and chill for 1 hour.  Brining will firm the flesh as well as remove the albumin.  Albumin doesn't effect the taste of the dish but it will congeal during cooking and make that white gunky stuff you may have seen on cooked salmon before.


Place brined salmon in a Zip Lock bag.  With the bag still unsealed, dunk in water as far down as possible  without allowing any water to breach the top. The pressure of the water will force the majority of air from the bag (displacement) and THEN zip the bag shut. 


Prepare the sous vide bath and monitor temperature to maintain 140F. If the temperature goes above your target, reduce the heat slightly or/add additional cold water. If the temperature falls below your target...duh...turn up the heat.  


Cook sous vide at 140F for 25 minutes, maintaining target temperature as accurately as practical.

 Pinto Bean Foam


Combine in pressure cooker

3/4 cup (150g) dry pinto beans
1 2/3 cup (400g) water
2 1/4 tsp (10g) lard
 

Pressure cook for 1 hour at 15psi (High if using an electric model)

Blend until smooth


Rough chop Epazote

Add 1/2 cup (100g) of heavy cream to blended beans.  Reheat and add chopped epazote and salt to taste.


Place mixture in whipping siphon and charge with 3 cartridges of nitrous oxide.


tomatillo, epazote salsa

Husk and rinse tomatillos. Place on baking sheet.


Place tomatillos under the broiler until charred (about 5 minutes per side)

Blend roasted tomatillos and salt to taste

Add fresh chopped epazote.

finish

The only caveat to sous vide cooking is keeping in mind that foods will not "brown" in the bag (or in kitchen-talk, no Maillard Reaction) Fortunately there's a simple fix.  Heat a pan on high and add a small amount of high temperature oil such as peanut.  Sear the salmon, skin side down until crisp and brown.

Add a dollop of pinto bean foam to plate

Portion salmon and place next to pinto foam. Top with tomatillo, epazote salsa and additional fried salmon skin for texture.  Serve with remaining salsa on side for any hard core epazote fans.